How to Guide

Wallpaper Mural Installation

1. Introduction

Thank you for choosing yesMyDesign for your wallpaper mural investment.
This guide provides a step by step direction to install your PVC-free water-activated custom wallpaper mural.
Before you start the installation, ensure you have all the tools needed.
Before you start check out the Key Tips (on last page).

2. Lay flat the Wallpaper

Lay flat the Wallpaper image guide
  1. Your wallpaper mural is supplied in panels.
  2. Unpack your delivery and lay each panel flat in order and leave to rest until panels flatten out.
  3. Make sure that you check over your wallpaper mural carefully when you open your delivery.

3. Create a Guideline

Create a guideline image guide
  1. Use a spirit level and tape measure to draw a straight vertical guideline.
  2. Measure the panel’s width and deduct 5cm for the bleed/extra paper.
  3. Use this result as the measure from the edge of the wall.
  4. Use the spirit level to ensure the measurements are straight, draw a line from the ceiling to the floor vertically.
  5. If the wall is not square, this line will help you guide your panel into place to ensure its applied straight.
  6. Ensure the wall is square.
    • If you are butting into another wall, use the vertical left-hand edge as your square.
    • If the other wall is not square, allow the panel to run off the left-hand edge and align to the right-hand side vertical guideline you have drawn on the wall. The left-hand side will be trimmed later.

4. 1st Panel

First Panel image guide
First Panel -1 image guide
  1. 1st Panel. Lay flat
  2. Wet (soak) the back and front of printed panel with water using the spray bottle and sponge.
  3. Let sit for approximately 1 minute.
  4. Line up the top edge of the panel with your ceiling or cornice.
  5. Smooth it onto the wall with your sponge.
  6. Ensure the wall is square.
  7. Apply it to the wall working down towards the bottom of the panel.
  8. If you need to re-position any part of the panel, simply lift the appropriate amount away from the wall and re-apply.
  9. Gently smooth out the wallpaper mural as you go.
  10. Continue to smooth on with your sponge
  11. Your install buddy can guide the bottom of the panel to ensure it is following your vertical guideline during this process.
  12. Work your way down and outwards to remove any bubbles.
  13. Use your sponge so you can feel any imperfections then wipe bubbles out to nearest edge.
  14. Let the wallpaper mural fall naturally into place, don’t try and stretch into place.
  15. If alignment is out, reposition the panel.

5. 2nd and subsequent panels

Second and subsequent panels image guide
  1. All additional panels are to be applied as per panel 1.
  2. Note all vertical drops on additional panels have a 1cm overlap
  3. Apply the second and subsequent panels, making sure that the panels laid with a 1cm overlap.
  4. Smooth all wrinkles and bubbles but avoid using too much pressure as you may damage the print.
  5. All bubbles and wrinkles should just rub out, however if they don’t, slowly remove the affected area and re-apply.
  6. Simply align image at top, whilst your install buddy helps you align at base.
  7. If your ceiling line is square you will find this a very simple process.
  8. If you are installing a detailed image or pattern, align the panel to the image at the top with the previous panel and smooth onto the wall.
  9. If you do not get it aligned and print become difficult to use (sticking too much to wall), reapply water and go again until print in aligned.
  10. Next panel…..
  11. Ensure that the pattern or image matches up as you apply each panel.
  12. When all panels have been installed, carefully trim the top, bottom and far left and right sides of your mural with a sharp knife.

6. Installation Complete

Installation Complete image guide
  1. You have now created the perfect feature wall – congratulations!!
  2. Now it is time to relax and enjoy your custom-made wallpaper mural.

Key Tips

  1. This guide is designed to assist in the preparation for PVC-free water-activated Wallpaper Mural installation.
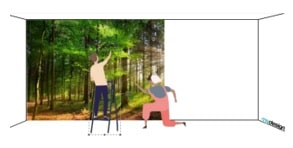
  2. For best results use two people (“Install Buddy”) to complete the installation.
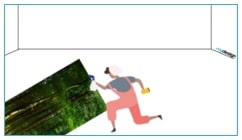
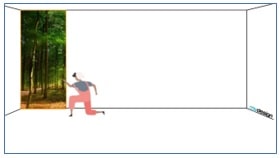
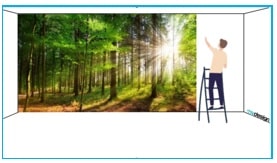
  3. Work left to right. Start from the left with wallpaper mural panel indicated number “1” on reverse, and then sequentially as per your labelled wallpaper mural panels.
  4. Take your time.
  5. Wallpaper mural is delivered in panels of 700-1000mm whichever suits the overall width of your wall.
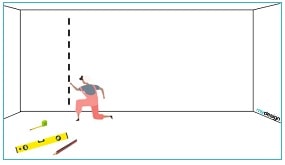
  6. Positioning the 1st panel is critical as this sets the basis for the rest of the panels
  7. 1st panel must be level at the top!
  8. If the wall is not square you may need to slightly overhang 1st panel on the left side then trim later.
  9. Panels are installed in sequential order.
  10. There are more Guides to assist in preparation of your custom wallpaper mural. Check them out on our website: yesMyDesign.com.au
  11. Recommended tools are:

How to install wallpaper